
- Wed Jan 05, 2011 2:56 pm
#81743
Photos of the finished product and set-up on page 3!
Check bottom of this post for regular updates!
Hello everyone!
The topic title is odd, I know, but bare with me as all shall soon be revealed. I was devouring the few remaining Ferrero Roché out of our Ferrero Collection box we had over Christmas and was struck with an idea. I'm very much into recycling and making use of whatever I can in whatever way, and I had the idea to re-use this stylish, simple box and the interior bits(minus the chocolate, that's for me) as a seed tray!
I wanted to get some photos, but the quality leaves a lot to be desired. I struggle to hold a camera, and it is a very tempermental camera so I was unable to get a photograph of the finished product, but here we go anyway!
Here's the Ferrero Collection box I was telling you about. Excuse the paws, that's one of our resident trouble makers. He was determined to help me prepare this box.

For those of you who are unaware of Ferrero Roché: they're a type of confectionary. A hazelnut coated in chocolatey truffly goodness in a crisp shell. In our collection box we had three varieties, the regular type, dark chocolate and coconut/white chocolate. Om nom nom.
Here's the box when it's taken apart. As you can see the pockets in the plastic tray would be ideal for seeds, and they are designed so whatever is in each pocket is easy to get to, which would make replanting any seedlings a little easier.
The plastic tray seemed perfect as a seed tray, and the solid base in which the tray was snugly fit would be a perfect water dish: solid and flat. The water would be evenly distributed to each pocket when it was placed in the tray and if the tray was on an even surface. Just so you know, I did do a test to see if the base would leak, it didn't leak, yay!
The only problem was the plastic tray needed holes, which it currently didn't have. Bring in the corkscrew, the pair of scissors and the pencil (I do not have photos so just pretend for a minute that there is a photo here!).
[Pretend photo]
My idea was to create a weak point in the bottom of each pocket in the plastic tray, then open this weak point into a small hole using the scissors and then widening it into a reasonably small yet effective hole using the pencil. I would put two holes in the bottom of each pocket. I tested it on one of the corner pockets to see if it would work -- and it did!
I didn't think it would be very easy to pour water into the bottom half of the box so I removed two corner pockets to allow me to pour in water from either side. My cutting skills are poor as well (darn manual dexterity!), so I was very careful heh. Sharp plastic.
Once I'd sorted the basic things out, I set to cleaning the box with some distilled water and kitchen towel. Naturally, my cat helped.
After an hour of poking holes in things, trying not to chop my fingers off and making sure everything worked fine and dandy I was left with a prettyful seed tray. As I mentioned earlier, I couldn't get a photo of the final product but here it is mid-production.
I tested the usefulness of this tray by putting water in the plastic-base-square-box-thing and putting the tray on top. The water filled each pocket evenly, which was a huge success. Now, you can see on the box that eight of the pockets have a small indentation in the centre. I did not make holes in the bottom of these pockets, as the plastic was bent, I thought it would be too weak for me to pierce and also a little harder to get seedlings out without possibly damaging them.
I wanted your opinions on whether you think this box tray could work. Obviously I would probably just use it for germination, but I will not re-attach the lid, as it is designed to be air-tight and that is not a good thing. I would probably place the box somewhere with air-movement.
If worst comes to worst and this isn't ideal, at least I had something to do this morning.
----------------------------------------------------------------------------------------------------------------------------------
I've decided to update this post with news of my seeds (purchased from Matt). I've had success with germination in the past, but the seedling died and so I wanted to log everything I did and share it with you all. It will also give me a good indication (if anything goes wrong) of what I have done wrong.
I've chosen to test the "bottle greenhouse" method with three seeds. I've had success with the bottle greenhouse (bottle with bottom cut off & cap left off) with helping smaller plants to grow, and wanted to see if it would help with seeds.
15th January 2011
Planted 20 venus fly trap seeds today. Using a custom-made seed tray in a plastic propagator.
26th January 2011
It’s been 11 days and no signs of germination yet. It can take up to three months for seeds to germinate. Whew.
27th January 2011
Planted three venus fly trap seeds in a small pot and covered it with a small, cut clear plastic bottle; this should keep the temperature steady and humidity high. The bottom of the bottle has been cut off and placed over the entire pot. The cap has been removed.
29th January 2011
I checked over the seeds today. It’s hard finding a black dot in a dark brown pile of mush but I found one seed and I can see a small green dot on it! The seed shell has broken and it’s starting to germinate!! It’s a bit soon to start counting my chickens but here’s hoping it’ll survive.
1st February 2011
Checked the seeds again today – another three have definitely germinated! That’s four in total. Checking every day to see if anything new develops. Fantastic!
2nd February 2011
Noticed another seed germinated. Five in total now. On a non carnivorous note: Pickle gave birth again, yay!
3rd February 2011
Six more seeds have germinated. Eleven total now.
9th February 2011
14 seedlings in total right now. They all look fantastic and some are finally escaping their seed shell. I'm going to wait until they start developing their first traps before transplanting them from the safety of the propagator. It could be another week to ten days before that happens. Keeping my fingers crossed things continue the way they have been.
11th February 2011
15 of 20 seeds have germinated so far. Each seedling is at a different stage so the remaining 5 seeds may still germinate. The first seedling to germinate looks wonderful and is growing vigorously; all the other seedlings look beautiful as well and are a healthy shade of green. Looking to move them into a brighter position soon.
13th February 2011
I believe another seed has started to germinate in my propagator box. Do you remember that greenhouse bottle experiment I did? Yeah, one of the seeds in there has started to germinate as well. It doesn't look as green and healthy as the others.
Three of the seedlings in my propagator box have started to completely shed their seed casing. They look beautiful and are bigger than I thought they would be! I purchased some plant pots yesterday that I'll transfer them to when they are a little bigger. Woo!
15th February 2011
The seed that has germinated in my greenhouse bottle experiment looks much healthier than two days ago. No other seeds have germinated.
All seedlings in my propagator box are making steady progress and I am excited to be able to replant them in about a month's time. As they are all at different stages I am a little concerned that I will provide the wrong conditions for some, whereas those same conditions will be ideal for others.
I am contemplating potting them individually as and when they reach my "comfortable size" although this will prolong the use of my Ferrero seed tray. I've also decided that once the seed tray is empty I will be planting my remaining venus fly trap seeds. I would also like to start germinating my cobra lily seeds over the next month or so. Other projects are delaying this.
20th February 2011
Another seed in my greenhouse bottle experiment has germinated. All the seedlings in my propagator are looking great; many have shed their seed casing and are reaching for the light! I shall be repotting them in actual pots and placing them back in the propagator for a further two weeks when my soil arrives. I'll try not to disturb the developing roots. Once the two week period is over I'll remove the cover of the propagator once and for all. Yay!
Check bottom of this post for regular updates!
Hello everyone!
The topic title is odd, I know, but bare with me as all shall soon be revealed. I was devouring the few remaining Ferrero Roché out of our Ferrero Collection box we had over Christmas and was struck with an idea. I'm very much into recycling and making use of whatever I can in whatever way, and I had the idea to re-use this stylish, simple box and the interior bits(minus the chocolate, that's for me) as a seed tray!
I wanted to get some photos, but the quality leaves a lot to be desired. I struggle to hold a camera, and it is a very tempermental camera so I was unable to get a photograph of the finished product, but here we go anyway!
Here's the Ferrero Collection box I was telling you about. Excuse the paws, that's one of our resident trouble makers. He was determined to help me prepare this box.

For those of you who are unaware of Ferrero Roché: they're a type of confectionary. A hazelnut coated in chocolatey truffly goodness in a crisp shell. In our collection box we had three varieties, the regular type, dark chocolate and coconut/white chocolate. Om nom nom.
Here's the box when it's taken apart. As you can see the pockets in the plastic tray would be ideal for seeds, and they are designed so whatever is in each pocket is easy to get to, which would make replanting any seedlings a little easier.

The plastic tray seemed perfect as a seed tray, and the solid base in which the tray was snugly fit would be a perfect water dish: solid and flat. The water would be evenly distributed to each pocket when it was placed in the tray and if the tray was on an even surface. Just so you know, I did do a test to see if the base would leak, it didn't leak, yay!
The only problem was the plastic tray needed holes, which it currently didn't have. Bring in the corkscrew, the pair of scissors and the pencil (I do not have photos so just pretend for a minute that there is a photo here!).
[Pretend photo]
My idea was to create a weak point in the bottom of each pocket in the plastic tray, then open this weak point into a small hole using the scissors and then widening it into a reasonably small yet effective hole using the pencil. I would put two holes in the bottom of each pocket. I tested it on one of the corner pockets to see if it would work -- and it did!
I didn't think it would be very easy to pour water into the bottom half of the box so I removed two corner pockets to allow me to pour in water from either side. My cutting skills are poor as well (darn manual dexterity!), so I was very careful heh. Sharp plastic.
Once I'd sorted the basic things out, I set to cleaning the box with some distilled water and kitchen towel. Naturally, my cat helped.

After an hour of poking holes in things, trying not to chop my fingers off and making sure everything worked fine and dandy I was left with a prettyful seed tray. As I mentioned earlier, I couldn't get a photo of the final product but here it is mid-production.

I tested the usefulness of this tray by putting water in the plastic-base-square-box-thing and putting the tray on top. The water filled each pocket evenly, which was a huge success. Now, you can see on the box that eight of the pockets have a small indentation in the centre. I did not make holes in the bottom of these pockets, as the plastic was bent, I thought it would be too weak for me to pierce and also a little harder to get seedlings out without possibly damaging them.
I wanted your opinions on whether you think this box tray could work. Obviously I would probably just use it for germination, but I will not re-attach the lid, as it is designed to be air-tight and that is not a good thing. I would probably place the box somewhere with air-movement.
If worst comes to worst and this isn't ideal, at least I had something to do this morning.
----------------------------------------------------------------------------------------------------------------------------------
I've decided to update this post with news of my seeds (purchased from Matt). I've had success with germination in the past, but the seedling died and so I wanted to log everything I did and share it with you all. It will also give me a good indication (if anything goes wrong) of what I have done wrong.
I've chosen to test the "bottle greenhouse" method with three seeds. I've had success with the bottle greenhouse (bottle with bottom cut off & cap left off) with helping smaller plants to grow, and wanted to see if it would help with seeds.
15th January 2011
Planted 20 venus fly trap seeds today. Using a custom-made seed tray in a plastic propagator.
26th January 2011
It’s been 11 days and no signs of germination yet. It can take up to three months for seeds to germinate. Whew.
27th January 2011
Planted three venus fly trap seeds in a small pot and covered it with a small, cut clear plastic bottle; this should keep the temperature steady and humidity high. The bottom of the bottle has been cut off and placed over the entire pot. The cap has been removed.
29th January 2011
I checked over the seeds today. It’s hard finding a black dot in a dark brown pile of mush but I found one seed and I can see a small green dot on it! The seed shell has broken and it’s starting to germinate!! It’s a bit soon to start counting my chickens but here’s hoping it’ll survive.
1st February 2011
Checked the seeds again today – another three have definitely germinated! That’s four in total. Checking every day to see if anything new develops. Fantastic!
2nd February 2011
Noticed another seed germinated. Five in total now. On a non carnivorous note: Pickle gave birth again, yay!
3rd February 2011
Six more seeds have germinated. Eleven total now.
9th February 2011
14 seedlings in total right now. They all look fantastic and some are finally escaping their seed shell. I'm going to wait until they start developing their first traps before transplanting them from the safety of the propagator. It could be another week to ten days before that happens. Keeping my fingers crossed things continue the way they have been.
11th February 2011
15 of 20 seeds have germinated so far. Each seedling is at a different stage so the remaining 5 seeds may still germinate. The first seedling to germinate looks wonderful and is growing vigorously; all the other seedlings look beautiful as well and are a healthy shade of green. Looking to move them into a brighter position soon.
13th February 2011
I believe another seed has started to germinate in my propagator box. Do you remember that greenhouse bottle experiment I did? Yeah, one of the seeds in there has started to germinate as well. It doesn't look as green and healthy as the others.
Three of the seedlings in my propagator box have started to completely shed their seed casing. They look beautiful and are bigger than I thought they would be! I purchased some plant pots yesterday that I'll transfer them to when they are a little bigger. Woo!
15th February 2011
The seed that has germinated in my greenhouse bottle experiment looks much healthier than two days ago. No other seeds have germinated.
All seedlings in my propagator box are making steady progress and I am excited to be able to replant them in about a month's time. As they are all at different stages I am a little concerned that I will provide the wrong conditions for some, whereas those same conditions will be ideal for others.
I am contemplating potting them individually as and when they reach my "comfortable size" although this will prolong the use of my Ferrero seed tray. I've also decided that once the seed tray is empty I will be planting my remaining venus fly trap seeds. I would also like to start germinating my cobra lily seeds over the next month or so. Other projects are delaying this.
20th February 2011
Another seed in my greenhouse bottle experiment has germinated. All the seedlings in my propagator are looking great; many have shed their seed casing and are reaching for the light! I shall be repotting them in actual pots and placing them back in the propagator for a further two weeks when my soil arrives. I'll try not to disturb the developing roots. Once the two week period is over I'll remove the cover of the propagator once and for all. Yay!
"Retired" in 2017.
List of online carnivorous plant suppliers
List of online carnivorous plant suppliers

 - By ChefDean
 - By Spunro
 - By thepitchergrower
 - By Hedonista
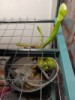 - By andynorth
 - By Panman
 - By Garden_Nymph