FlytrapCare Carnivorous Plant Forums

Sponsored by FlytrapStore.com

Talk about anything you want in this forum.

Moderator: Matt

User avatar
By roarke
Posts:  2415
Joined:  Sun Nov 08, 2009 3:11 am
#286665
I was thinking first that it may be good to put this thread on "Artificial lighting". But if you repair your pots, stands etc. this thread may stand here.
The problem :
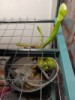
My fluorescent lamp would not stay on when i position the fixture up or down or even if i rotated the lamp in a new position. Sometimes was on again.
The fix :
I have solder again the wire, which have been released by itself because of corosion. Sometimes it touched the metal part it needed, if i position the fixture up or down
Shut down your electrical current !
FIrst you may clean it
Image
Get a mirror without removing the plastic part
Image
See if you have screws or the plastic part slides, than remove it
Image
Image
Clean the inside if you can
Image
My problem was that the wire have been removed by itself because of corrosion
Image
Unsnap the plastic part from its holes
Image
The corrosion
Image
Loosen up the wires to make space
Image
Get a metal tweezer and scrap it off
Image
Fixed
Image
Plastic part slides back on
Image
Criss cross the wires
Image
Put in a diagonal way your adhesive tape
Image
And back again ...
Image
Hold your cable with something if you want to sit in a loose position on top of your light stand
Image
Image
Last edited by roarke on Mon Feb 20, 2017 7:58 pm, edited 1 time in total.
roarke, roarke, roarke liked this
By Jds
Posts:  730
Joined:  Sat May 02, 2015 5:58 pm
#286666
This is not actually repair but I thought I should post it here, as it relates to main topic.

Problem:-
Lack of space to keep more pots.

Solution/Repair:-
Buy hanging pots(image below) or make holes on the pots and hang them.
I know this is quite obvious but it really helped me.
Attachments:
IMG_20170220_180353.jpg
IMG_20170220_180353.jpg (494.17 KiB) Viewed 4638 times
Jds liked this
By Hungry Plants
Posts:  1134
Joined:  Mon Nov 28, 2016 2:41 am
#286897
Ok heres mine. I had an old light stand for reptiles that was meant to hold one dome light. It didn't really fit my needs. I needed more light. So I welded a bar across it and added two more hooks.

Image
Image
By Sakaaaaa
Posts:  1021
Joined:  Thu May 12, 2016 2:18 pm
#286901
roarke wrote:
Sakaaaaa wrote:The problem:
My growlist is tiny

The solution
I bought a utric and a sarr :D
Not quite repairing and modding.
I'm repairing my growlist ;)
Ok I'll do a REAL repair today sometime...
User avatar
By roarke
Posts:  2415
Joined:  Sun Nov 08, 2009 3:11 am
#287033
Hungry Plants wrote:Ok heres mine. I had an old light stand for reptiles that was meant to hold one dome light. It didn't really fit my needs. I needed more light. So I welded a bar across it and added two more hooks.
It has more than a few kilograms ?
User avatar
By roarke
Posts:  2415
Joined:  Sun Nov 08, 2009 3:11 am
#287034
[youtube]http://www.youtube.com/watch?v=nByR6D2kUFo[/youtube]

You can mod your artificial light place by using a reflective surface glued on two or more cardboard pieces with the aid of a stick from a tree branch. The stick stands on the far end on small wooden pieces. On the right there is a plant pot support, which now act as a stand for different things. The whole modding i did stands on two inverted drawers, for which i will talk about some other time in another video.
User avatar
By boarderlib
Posts:  1641
Joined:  Fri Dec 04, 2015 1:13 pm
#287700
My most recent mod was because my Repti-Fogger took a dump. Since I was in a hurry as I didn't want my Heli's to suffer I ran by Walmart and picked up a humidifier. The first pic shows what I had setup, and what I will be setting up. The Repti-Fogger (here out will be RF) had a flex tube that was about three feet long that would reach from the floor into the tank. The new humidifier is a room humidifier, so I needed to adapt it to release into the tank and not the room.

Image

My first thought was just adapt the exit from the RF to the top of the new humidifier, like here. Obviously cutting away any excess plastic, and taping or gluing it down. There was a big gap on one side allowing humidity to just go everywhere. That just won't work for me. I like my stuff clean, and efficient.

Image

Back to the drawing board. I noticed the top of the RF was a two piece design, so I carefully pried the two pieces apart, leaving my with this.

Image

This piece actually seats almost perfectly in where the vent piece was on the new humidifier. Almost. Hmm. A flexible gasket should fill any small cracks, crevices, or imperfections. I happen to have some clear heavy duty vinyl that should hold up to the moisture quite well. I cut my gasket out, and got some Lock Tite stick and seal. Be careful of which glue you use, as most strong adhesives will eat plastics.

I glued my gasket in, and glued my top on. Let the glue set, this takes awhile. After that was set up I attached the flex hose and turned it on. No leaks, and we have humidity pumping into the tank.

After about twenty minutes I noticed the fog wasn't rolling anymore, so I looked a little closer. The new humidifier isn't quite as powerful as the RF, and the tube had filled with water because of the ridges in it, basically causing a vapor lock. Okay, now I need to raise the humidifier and ditch the flex tube. Off to Home Depot. I grabbed a 5 foot section of 3/4" ID PCV tubing, and two 45 degree couplers, and two 90 degree couplers.

I pieced together a stand to raise the humidifier, and started piecing together my tube to go into the tank. I just used pressed fit, and glued the pieces together, since there's really no pressure in the line. I know the humidifier isn't very strong so I pieced the tube together so it will be uphill all of the way into the tank. That way the condensation build up will drip back into the humidifier and be recycled instead of just dripping into the tank only to be sucked out later and dumped down the drain.

All done. No leaks, no vapor lock.

Image

http://www.flytrapcare.com/phpBB3/board ... 30434.html
http://www.flytrapcare.com/phpBB3/board ... 31990.html

Edit: two things I overlooked mentioning. One, I went with PVC because they were out of the size vinyl tubing I was looking for, and the Home Depot guy wouldn't leave me alone so I could think.

Two, if you decide to use this with the PVC piping then leave one coupler closer to the humidifier unglued. A sort of quick release, so things can be moved around if needed.
Last edited by boarderlib on Wed Mar 08, 2017 12:55 pm, edited 1 time in total.
boarderlib, boarderlib liked this
By Adelaide
Posts:  538
Joined:  Wed Apr 06, 2011 10:05 pm
#287751
Wikiwakawakawee wrote:Not sure if this counts, but I had to make tiny shelves out of wooden rulers and foam so my plants can get more light.Image
Image
Image
Image

-The Waka
Are those shot glasses?

I dont know if this is too much but can you also a[…]

Hello from Arkansas!

Welcome

Hello, I would like to request D. capensis "[…]

Order received. Your order number is 1666. I'll PM[…]

New cultivar potential?

This plant always has something in its mouth :rol[…]

Black tips on drosera regia

It's probably nothing, as the whole plant seems to[…]

Yellowish leaves on N. ventrata

My 'Mimis Kiss' is finally growing pitchers again[…]

Support the community - Shop at FlytrapStore.com!