
- Tue Apr 06, 2010 4:28 pm
#50067
I have made many of these enclosures for aquariums, terrariums, and paludariums. I used GE Silicone II colored silicone. There is much debate over the new silicone and additives. In my opinion it was a marketing tactic. The MSDS sheet is exactly the same. The BioSeal I think is simply something that forms a hard coat on the silicone that ’ allow things to grow on it. I have had tanks as large as 60 gallons made with this silicone. I have used as many as 10 tubes in one tank.

The GE Silicone II offgasses ammonia unlike I which offgasses acetic acid (the vinegar smell). You must absolutely let the silicone fully cure for at least a week or more. If not the ammonia will be in your water and you will have to deal with it until it stops.
First things first. You must absolutely have clean glass. I used a 0000 steel wool pad and some dawn to clean the glass thoroughly. Rinse and dry. Then wipe it with alcohol.
The next step is to grate your coconut coir with a grater depending on how coarse you want the texture. You can also do it without grating it. I wanted it to look more like dirt, and not peat or roots.
If you are going to use any sand now would be the time to get it sifted or situated where you want it. Any driftwood that you want to use check now to see if and how it fits your tanks and layout.
Mock up anything now like heaters, tubes, etc. Plan all your routing for air hoses and things of that nature. Hide as much as you can without impeding water-flow. Take into consideration flow for returns for filters and heaters to have space to move water.
Tape off the areas you don’t want to get silicone on. A 2 inch piece of tape should help enough without taping off the entire inside of the tank. You want to remove that tape while the silicone is still wet. If allowed to dry you must cut it with a razor carefully. I have put it only on the back pane, on the sides partially, and completely.
With everything planned and ready you can start putting a very thin layer of silicone on your glass. using a caulk gun and a thin spatula or stick get it even. The more even you get coverage the better it will look from the outside. Finish the entire area before you put any decoration to it. It will stick to itself well enough.
After you have finished the initial coating of silicone in the color you desire it is time to break out the Great Stuff expanding foam. It is a polyurethane foam. Use either the standard or the one that expands a lot. Do not use the fire retardant foam. You will want to use gloves! This stuff doesn’t want to come off your skin.
Using the spray can of foam roughly adhere to your initial design and check things as you go. It will expand a lot. A lot. After you have put your foam in it is time to place your driftwood or anything that you want in there permanently. Try to let the wood sit on top of the foam as it will expand now.
You will be able to trim the foam later with a knife or saw. There are many things you can still do to the foam. You can also reapply foam in places that you damaged or missed earlier.
After the foam has dried you need to check your heaters and tubes and things like that. Cut away any foam now that you don’t want in places. Trim it for whatever purposes you want. You can add holes to place plants in now. I like to make holes to put soil in so that plants will be on the back wall. It is personal preference.
After the foam has been trimmed and fully dried it is time to coat the foam with silicone. A thin layer is about all that’s needed. You can always go back later and touch up those hard to get to places or the ones that you missed.
Work in small patches. Do not try to coat the whole thing at once. Work in 6 inch by 6 inch squares or so. Brush or wipe on silicone and then take a bit of whatever you are using, coconut coir, sand, gravel, and place it firmly into the silicone. Allow it to dry. Again, any places that you missed you can go back over and coat later to hide.
Once you have finished putting material on let it dry. it will need to cure for about a week. This is a must if you are to put anything into it. It will off-gas until it cures. If you put water in right away it will look fine but it will raise the ammonia level in the tank and kill your fish or whatever you are using.
I have used this method for all sorts of freshwater fish, invertebrates, snails, newts and various other things. One I am using to raise fry. It is easy to keep clean without any decor, but it gives the fry something to hide in so they will come out to eat more often.
There is again, much debate over the use of the GE Silicon II in an aquarium. I would not use Silicone II to build an aquarium of any size. I have used it to make 1×1×2 tanks and they hold up but I also have a drain i middle of the concrete floor of my fish room. Structurally I do not think it is strong like silicone meant for glass aquariums.
If you have reservations about your fish or plants dying do not try this method as I cant be accountable for your results. My results are favorable. I have had zero loss associated with this method. I have heard otherwise but I do not know what conditions they were in, how long the silicone was allowed to cure, or anything else.
If you want to try it but are afraid of having your fish die start with some small fish or plants. If allowed to cure you should have no more problems than setting up a new aquarium.
Remember that if you tore down an old tank and removed the biological filter that may create a problem that you would have anyway associated with setting up a new tank.
I really enjoy the tanks I set up in this manner and it definitely makes it much more interesting. If you are interetsed or disturbed by using the silicone that I used dont use it, try to find something else that youa re comfortable with. I havent had any problems.
I went back later and and covered up everything but the heater with silicone and sand and or coconut coir.

The GE Silicone II offgasses ammonia unlike I which offgasses acetic acid (the vinegar smell). You must absolutely let the silicone fully cure for at least a week or more. If not the ammonia will be in your water and you will have to deal with it until it stops.
First things first. You must absolutely have clean glass. I used a 0000 steel wool pad and some dawn to clean the glass thoroughly. Rinse and dry. Then wipe it with alcohol.

The next step is to grate your coconut coir with a grater depending on how coarse you want the texture. You can also do it without grating it. I wanted it to look more like dirt, and not peat or roots.
If you are going to use any sand now would be the time to get it sifted or situated where you want it. Any driftwood that you want to use check now to see if and how it fits your tanks and layout.

Mock up anything now like heaters, tubes, etc. Plan all your routing for air hoses and things of that nature. Hide as much as you can without impeding water-flow. Take into consideration flow for returns for filters and heaters to have space to move water.
Tape off the areas you don’t want to get silicone on. A 2 inch piece of tape should help enough without taping off the entire inside of the tank. You want to remove that tape while the silicone is still wet. If allowed to dry you must cut it with a razor carefully. I have put it only on the back pane, on the sides partially, and completely.
With everything planned and ready you can start putting a very thin layer of silicone on your glass. using a caulk gun and a thin spatula or stick get it even. The more even you get coverage the better it will look from the outside. Finish the entire area before you put any decoration to it. It will stick to itself well enough.
After you have finished the initial coating of silicone in the color you desire it is time to break out the Great Stuff expanding foam. It is a polyurethane foam. Use either the standard or the one that expands a lot. Do not use the fire retardant foam. You will want to use gloves! This stuff doesn’t want to come off your skin.
Using the spray can of foam roughly adhere to your initial design and check things as you go. It will expand a lot. A lot. After you have put your foam in it is time to place your driftwood or anything that you want in there permanently. Try to let the wood sit on top of the foam as it will expand now.
You will be able to trim the foam later with a knife or saw. There are many things you can still do to the foam. You can also reapply foam in places that you damaged or missed earlier.
After the foam has dried you need to check your heaters and tubes and things like that. Cut away any foam now that you don’t want in places. Trim it for whatever purposes you want. You can add holes to place plants in now. I like to make holes to put soil in so that plants will be on the back wall. It is personal preference.
After the foam has been trimmed and fully dried it is time to coat the foam with silicone. A thin layer is about all that’s needed. You can always go back later and touch up those hard to get to places or the ones that you missed.
Work in small patches. Do not try to coat the whole thing at once. Work in 6 inch by 6 inch squares or so. Brush or wipe on silicone and then take a bit of whatever you are using, coconut coir, sand, gravel, and place it firmly into the silicone. Allow it to dry. Again, any places that you missed you can go back over and coat later to hide.
Once you have finished putting material on let it dry. it will need to cure for about a week. This is a must if you are to put anything into it. It will off-gas until it cures. If you put water in right away it will look fine but it will raise the ammonia level in the tank and kill your fish or whatever you are using.
I have used this method for all sorts of freshwater fish, invertebrates, snails, newts and various other things. One I am using to raise fry. It is easy to keep clean without any decor, but it gives the fry something to hide in so they will come out to eat more often.
There is again, much debate over the use of the GE Silicon II in an aquarium. I would not use Silicone II to build an aquarium of any size. I have used it to make 1×1×2 tanks and they hold up but I also have a drain i middle of the concrete floor of my fish room. Structurally I do not think it is strong like silicone meant for glass aquariums.
If you have reservations about your fish or plants dying do not try this method as I cant be accountable for your results. My results are favorable. I have had zero loss associated with this method. I have heard otherwise but I do not know what conditions they were in, how long the silicone was allowed to cure, or anything else.
If you want to try it but are afraid of having your fish die start with some small fish or plants. If allowed to cure you should have no more problems than setting up a new aquarium.
Remember that if you tore down an old tank and removed the biological filter that may create a problem that you would have anyway associated with setting up a new tank.
I really enjoy the tanks I set up in this manner and it definitely makes it much more interesting. If you are interetsed or disturbed by using the silicone that I used dont use it, try to find something else that youa re comfortable with. I havent had any problems.


I went back later and and covered up everything but the heater with silicone and sand and or coconut coir.
 - By ChefDean
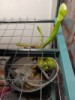 - By andynorth
 - By Intheswamp
 - By Nikson